Upload and manage Images
An image is a file that contains a virtual disk with an operating system that can be used to start a virtual machine in the cloud.
Based on your role, you might be allowed to upload and manage these images. Sometimes, only cloud administrators or operators are allowed to do this. If you have the right permissions, you can use the dashboard in the admin project to upload and manage images.
Upload an image
Follow this procedure to upload an image to a project:
- Log in to the dashboard.
- Select the appropriate project from the drop down menu at the top left.
- On the Project tab, open the Compute tab and click Images category.
- Click Create Image.
The Create An Image dialog box appears.
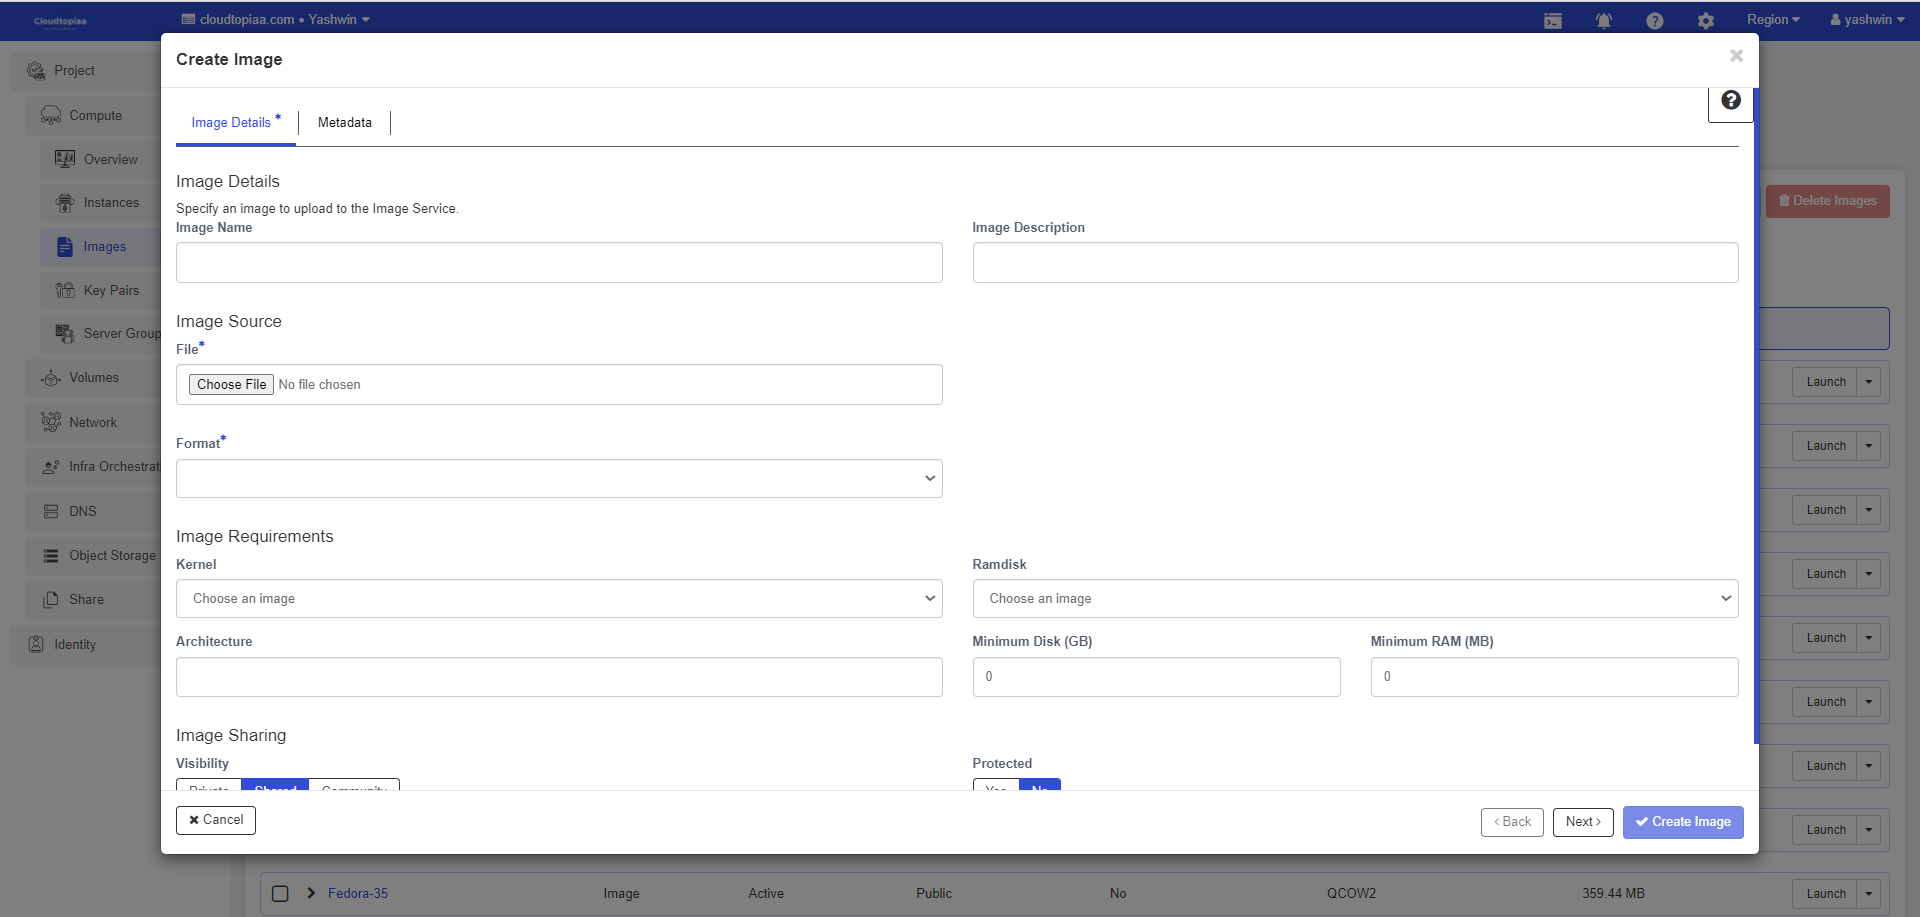
5. Enter the following values:
| Image Name | Enter a name for the image. |
| Image Description | Enter a brief description of the image. |
| Image Source | Choose the image source from the dropdown list. Your choices are Image Location and Image File. |
| Image File or Image Location | Based on your selection for Image Source, you either enter the location URL of the image in the Image Location field, or browse for the image file on your file system and add it. |
| Format | Select the image format (for example, QCOW2) for the image. |
| Architecture | Specify the architecture. For example, i386 for a 32-bit architecture or x86_64 for a 64-bit architecture. |
| Minimum Disk (GB) | Leave this field empty. |
| Minimum RAM (MB) | Leave this field empty. |
| Copy Data | Specify this option to copy image data to the Image service |
| Visibility | The access permission for the image. Public or Private. |
| Protected | Select this check box to ensure that only users with permissions can delete the image. Yes or No. |
| Image Metadata | Specify this option to add resource metadata. The cloudtopiaa Metadata Catalog provides a list of metadata image definitions. |
6. Click Create Image.
The image is queued to be uploaded. It might take some time before the status changes from Queued to Active.
The image is queued to be uploaded. It might take some time before the status changes from Queued to Active.
Update an image
Follow this procedure to update an existing image.
- Log in to the dashboard.
- Select the appropriate project from the drop down menu at the top left.
- Select the image that you want to edit.
- In the Actions column, click the menu button and then select Edit Image from the list.
- In the Edit Image dialog box, you can perform various actions. For example:
- Change the name of the image.
- Change the description of the image.
- Change the format of the image.
- Change the minimum disk of the image.
- Change the minimum RAM of the image.
- Select the Public button to make the image public.
- Clear the Private button to make the image private.
- Change the metadata of the image.
- Click Edit Image.

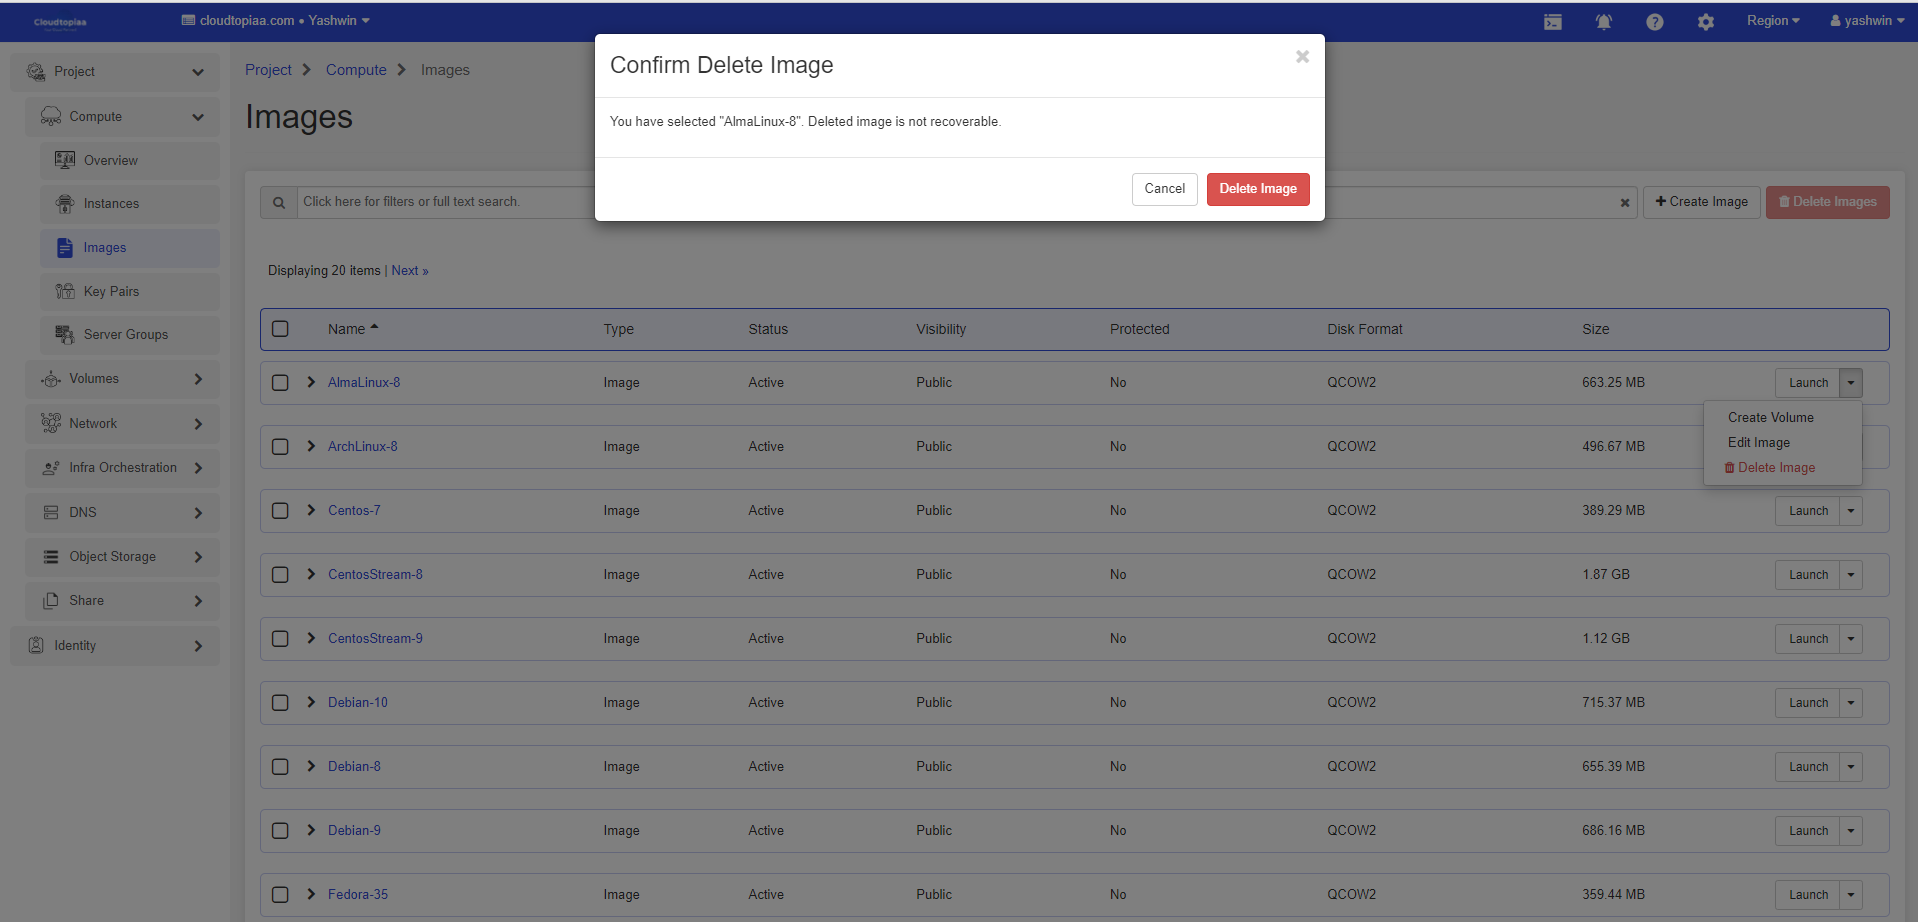
Delete an image
Deletion of images is permanent and cannot be reversed. Only users with the appropriate permissions can delete images.
- Log in to the dashboard.
- Select the appropriate project from the drop down menu at the top left.
- On the Project tab, open the Compute tab and click Images category.
- Select the images that you want to delete.
- Click Delete Images
- In the Confirm Delete Images dialog box, click Delete Images to confirm the deletion.