Manage Load Balancers
Create Load Balancer
- Log in to the dashboard.
- Select the appropriate project from the drop down menu at the top left
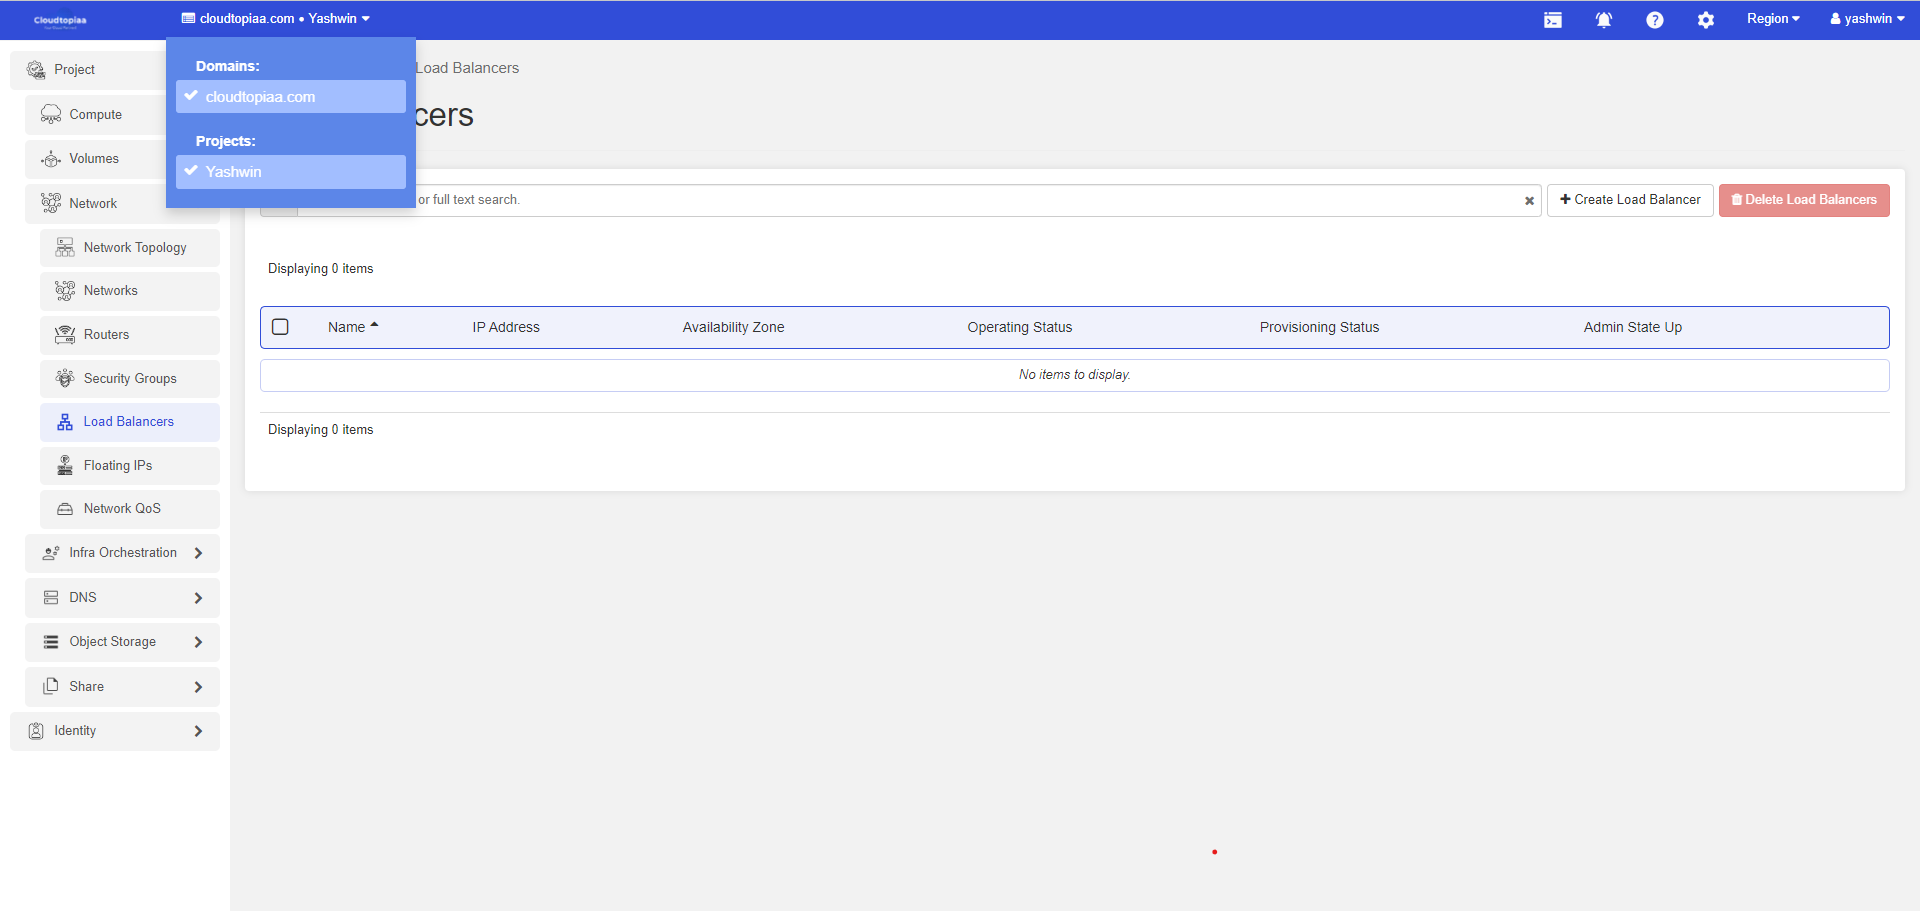
3. Navigate to Project > Network > Load Balancers
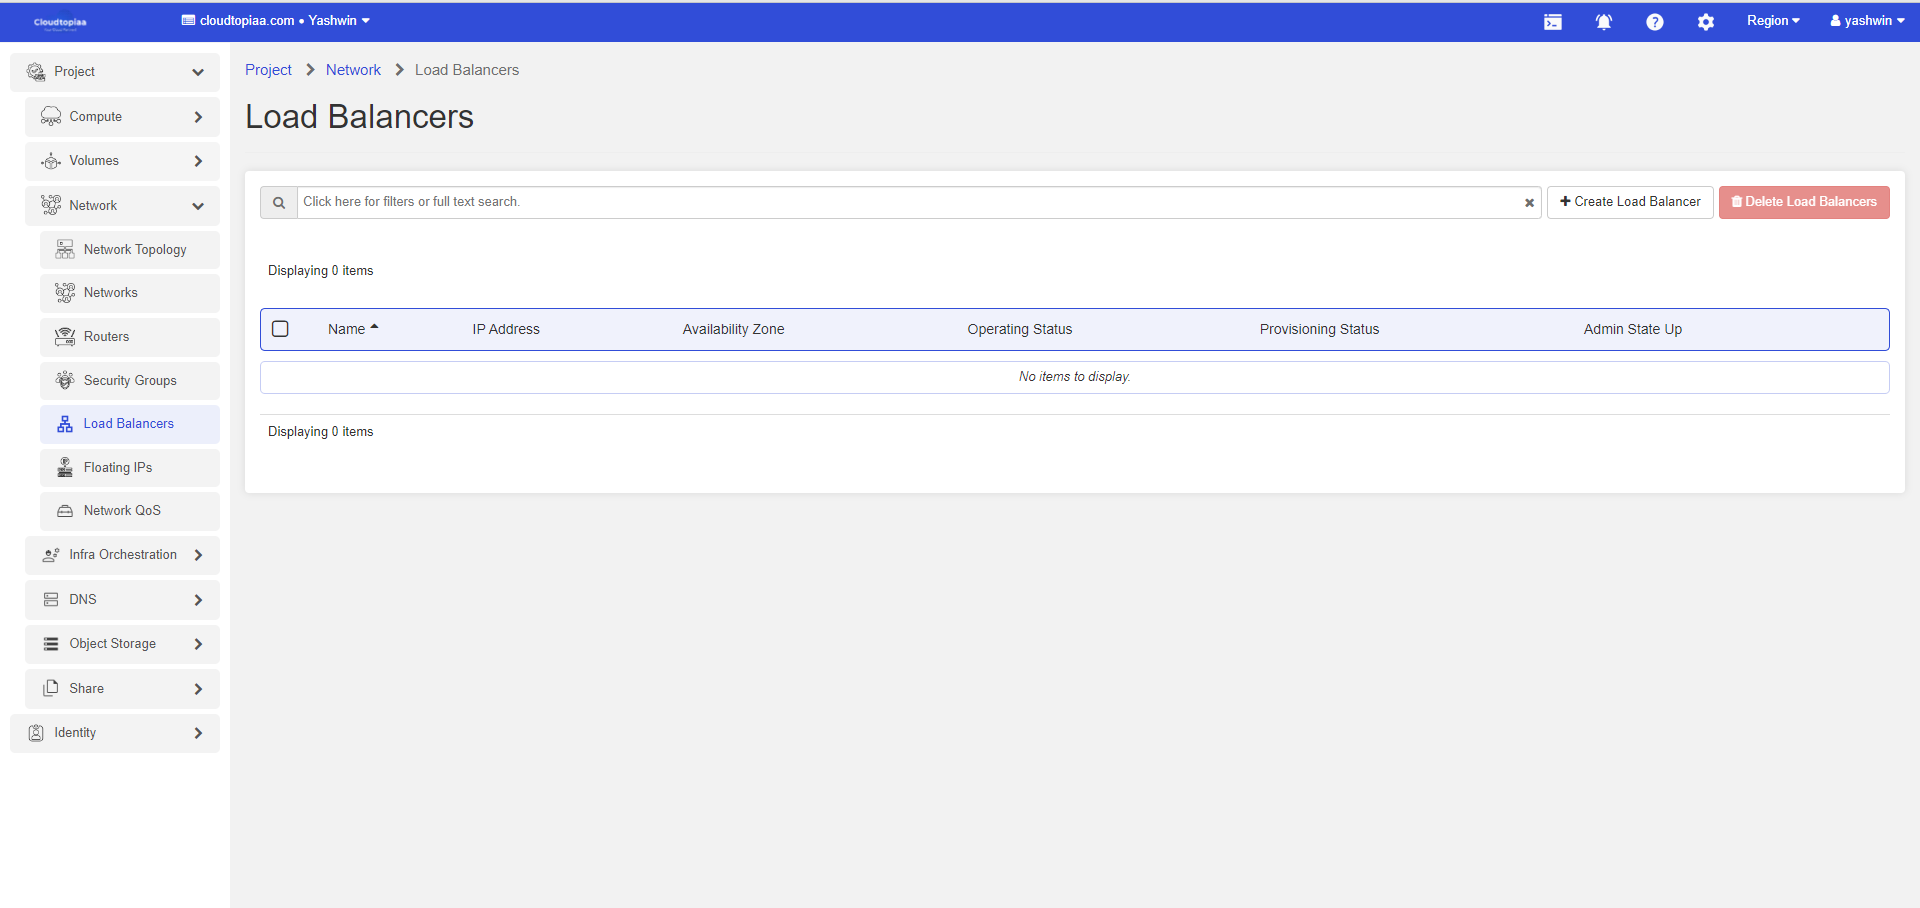
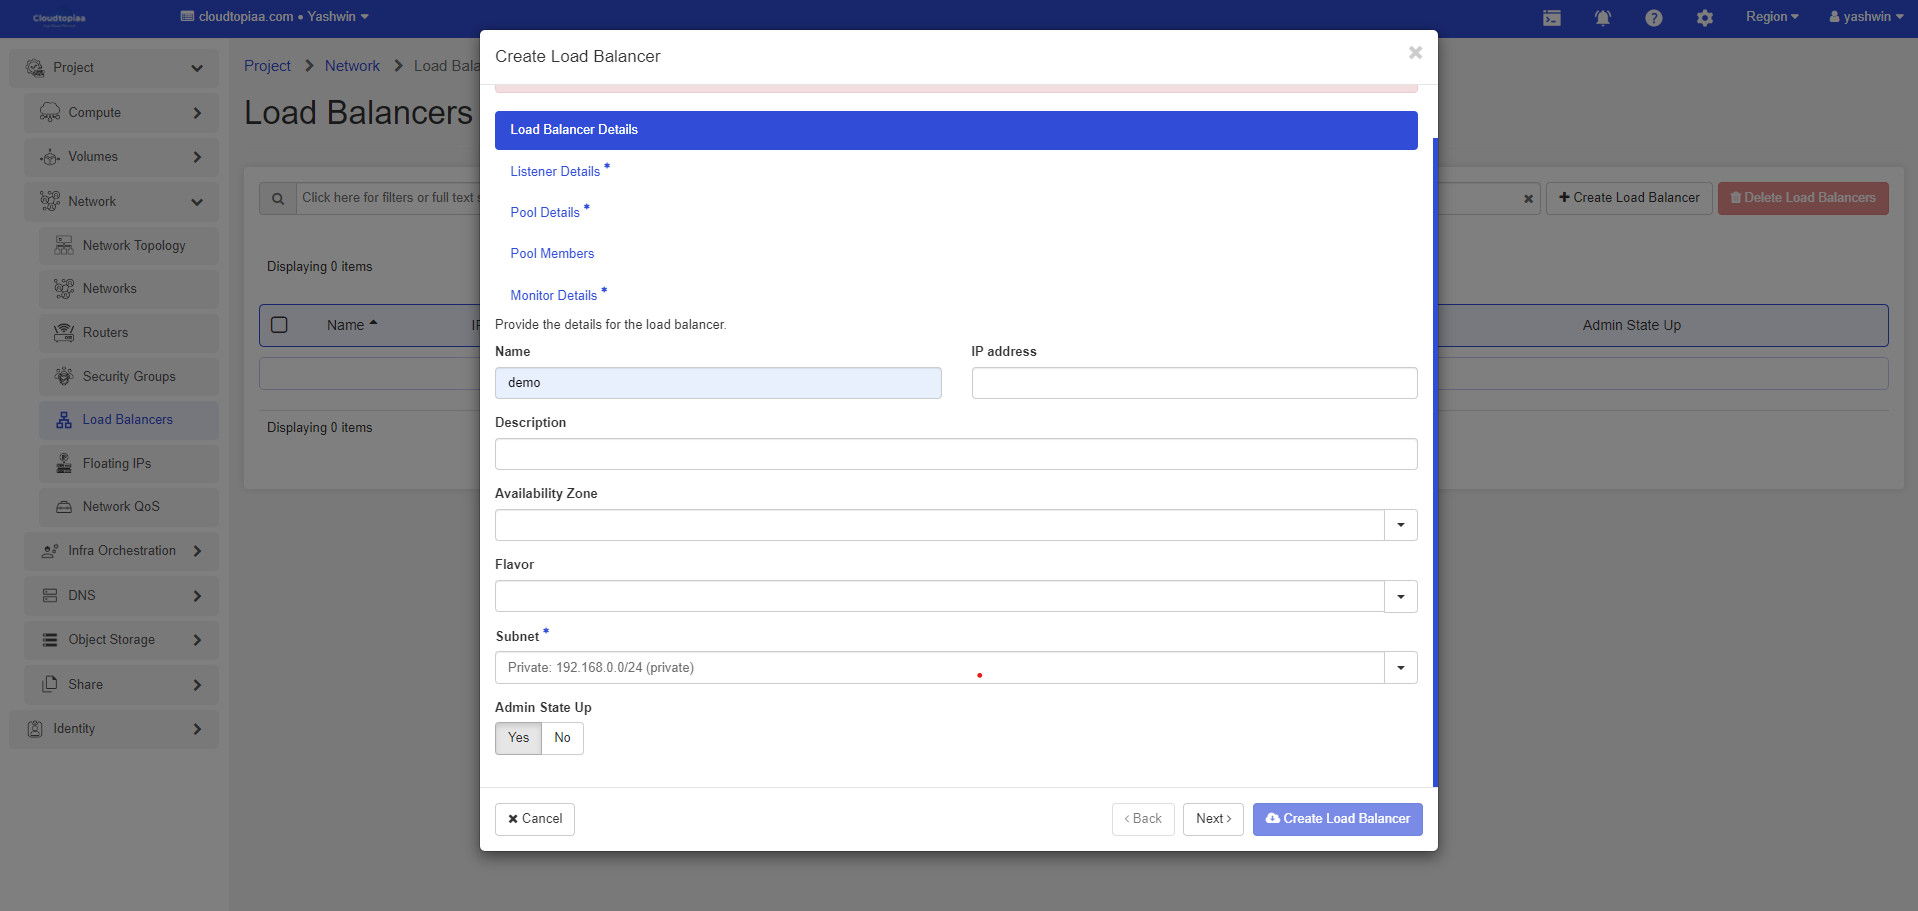
4. Click on Create Load Balancer add following details in Load Balancer Details tab, and click Next.
| Name | Load Balancer Name |
| Subnet | Select exiting private subnet |
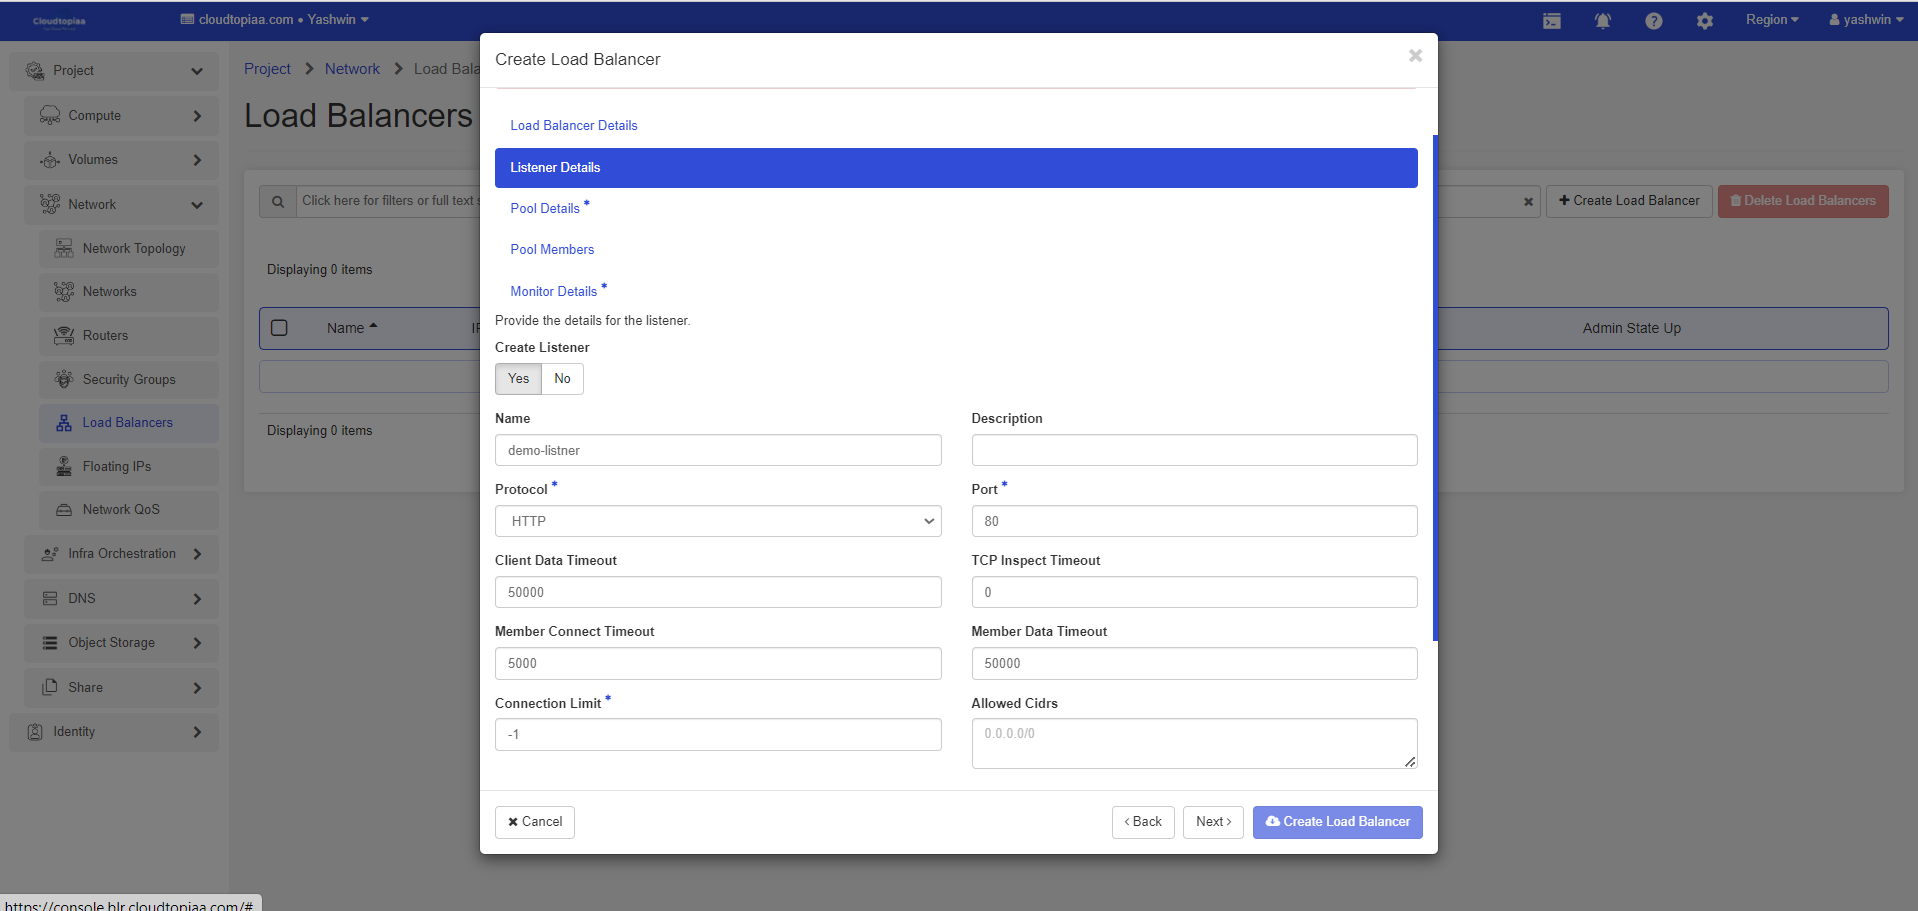
5. Add following details in Listener Details tab and click Next.
| Name | Listener name |
| Protocol | Listener protocol |
| Port | If custom port is specified in Protocol field then we need to specify the listening port |
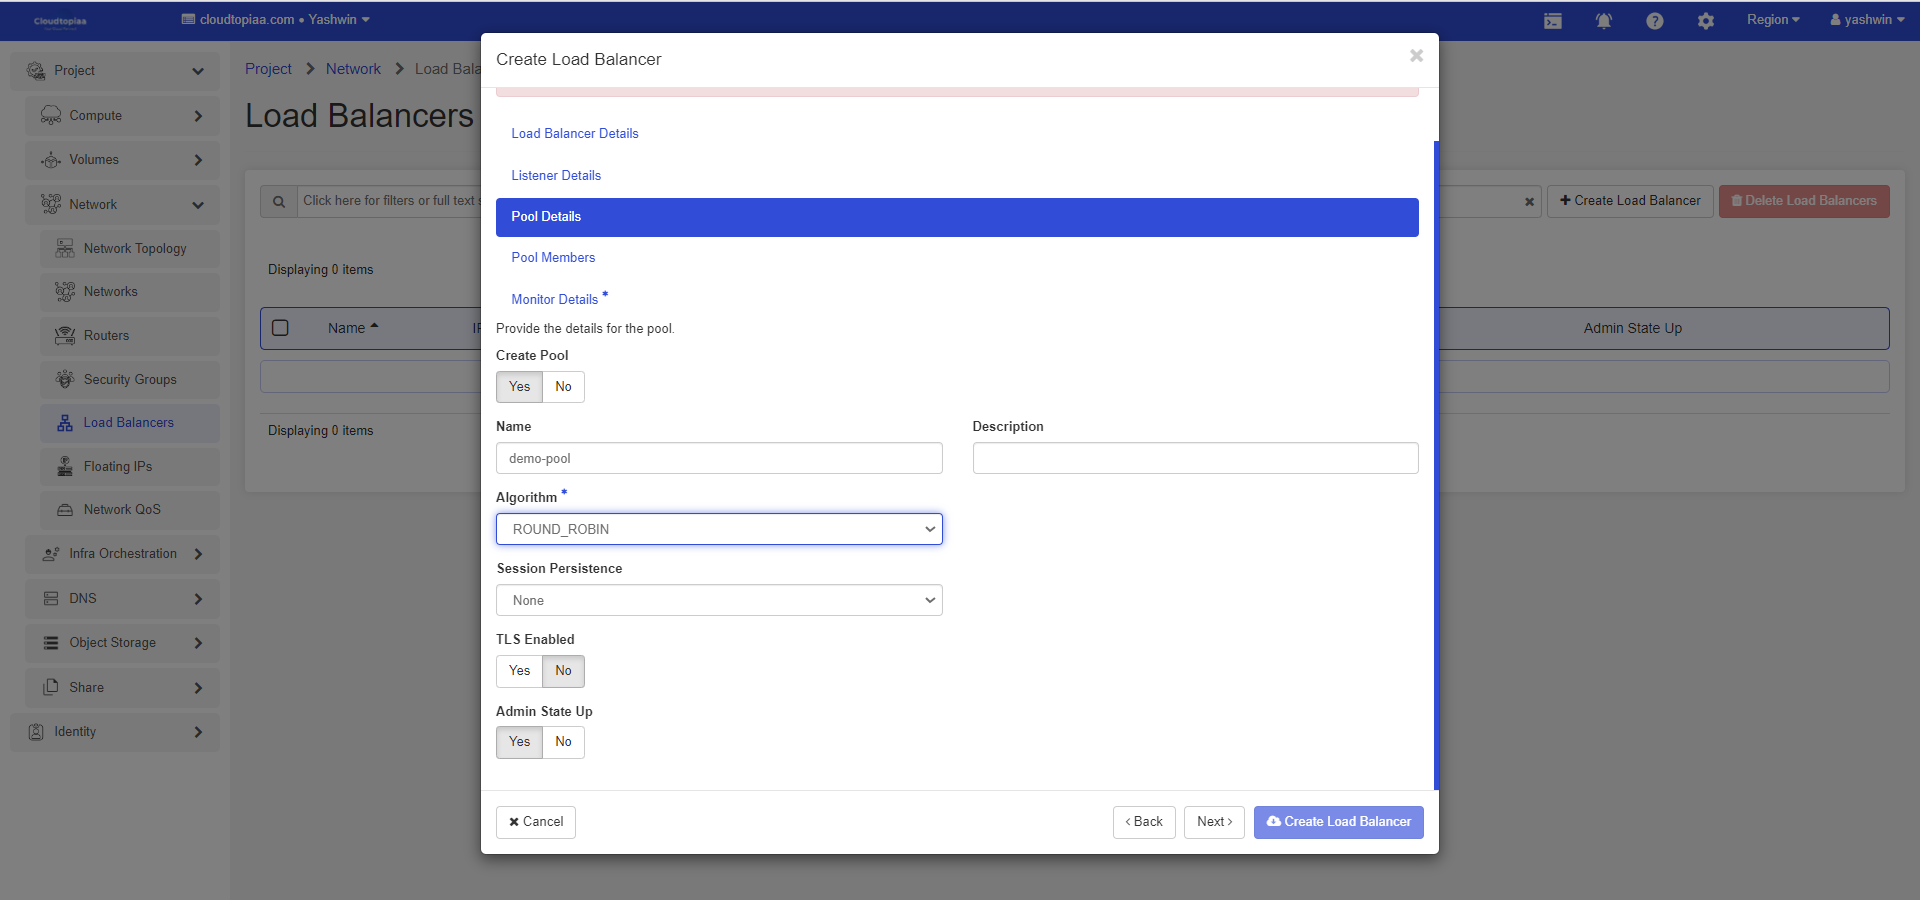
6. Add following details in Pool Details tab and click Next.
| Name | Pool name |
| Algorithm | Load balancing algorithm. Available algorithms are ROUND_ROBIN, LEAST_CONNECTIONS and SOURCE_IP. |
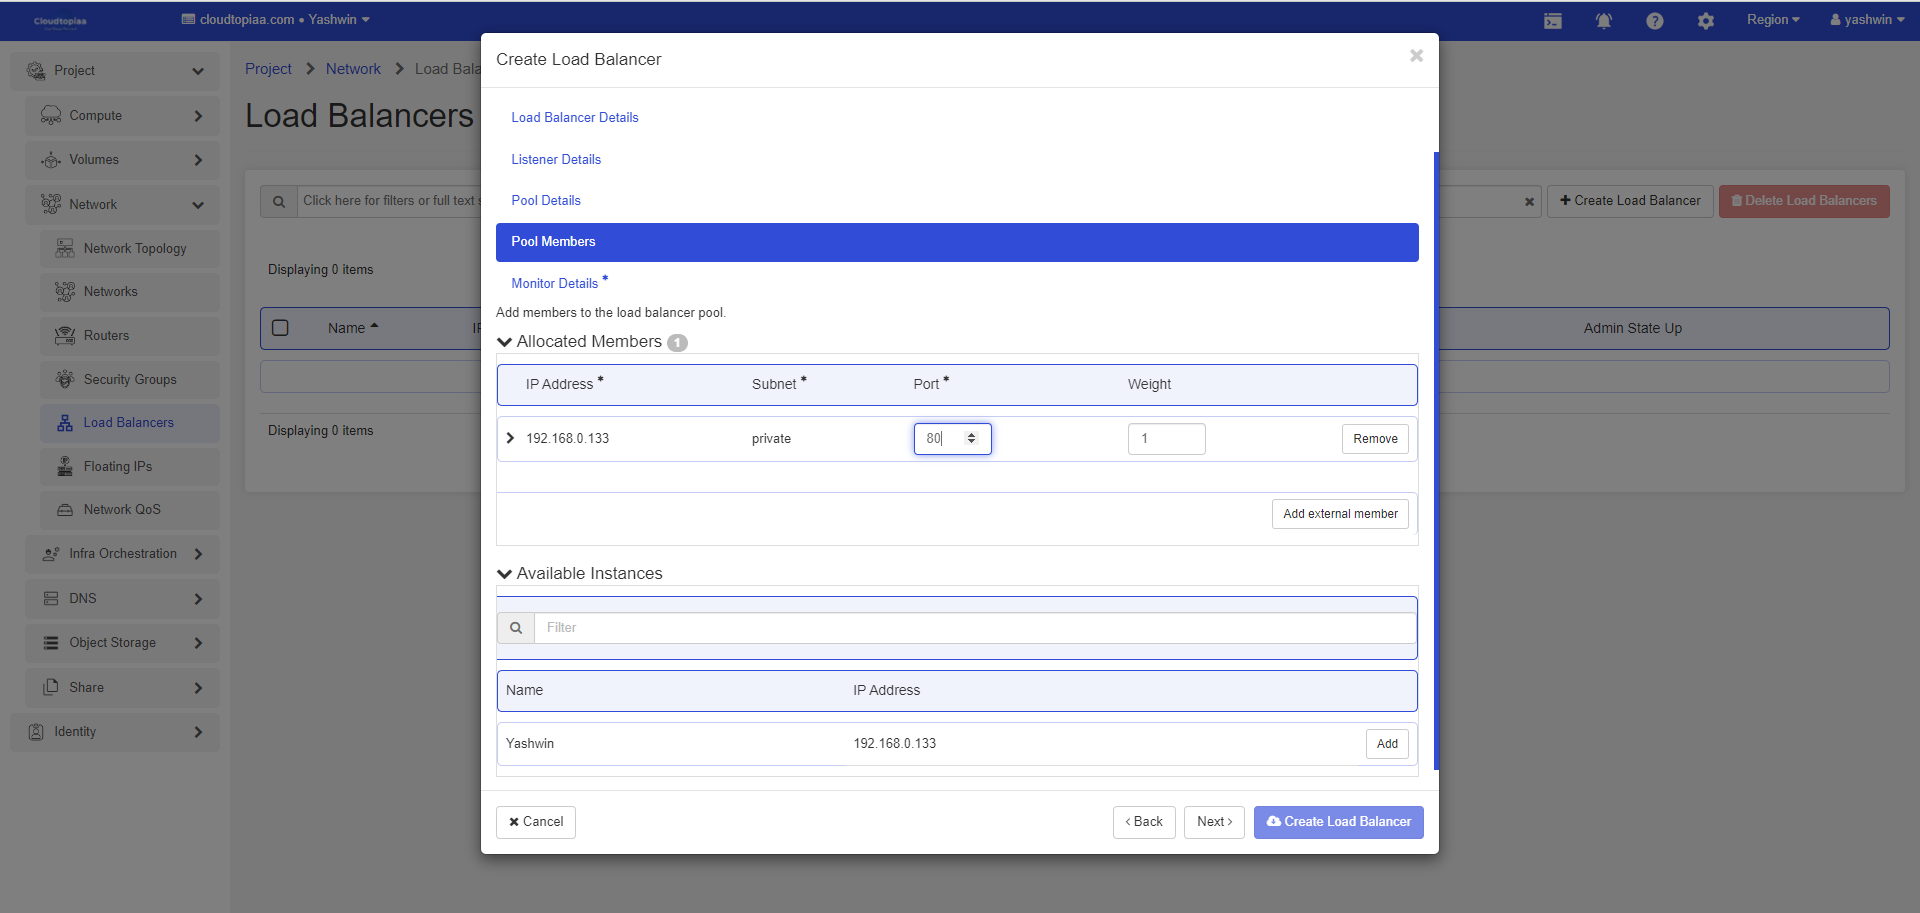
7. Select servers from the list below and add in the pool. Mention port for each member in Pool Members
tab and click Next.
8. Add following details in Monitor Details tab and click Create Load Balancer
| Name | Listener name |
| Type | Monitor type |
9. Load Balancer wil take couple of minutes to provision and transition from Pending Create to Active
state.
10. If load balancer needs to be accessed over internet, then we need assign floating ip. Open the
dropdown of the loadbalancer and click on Associate Floating IP.
11. Select the floating IP already reserved to the project. If none are available select public IP subnet, it will
automatically allocate a floating IP
12. Click on the dropdown beside load balancer name to view the details. We can find the Public IP
assigned to the load balancer in the details.
13.Following is a script to check if LB is functioning properly