Manage Images
Upload Image
Follow this procedure to upload an image to a project:
- Log in to the dashboard.
- Select the appropriate project from the drop down menu at the top left
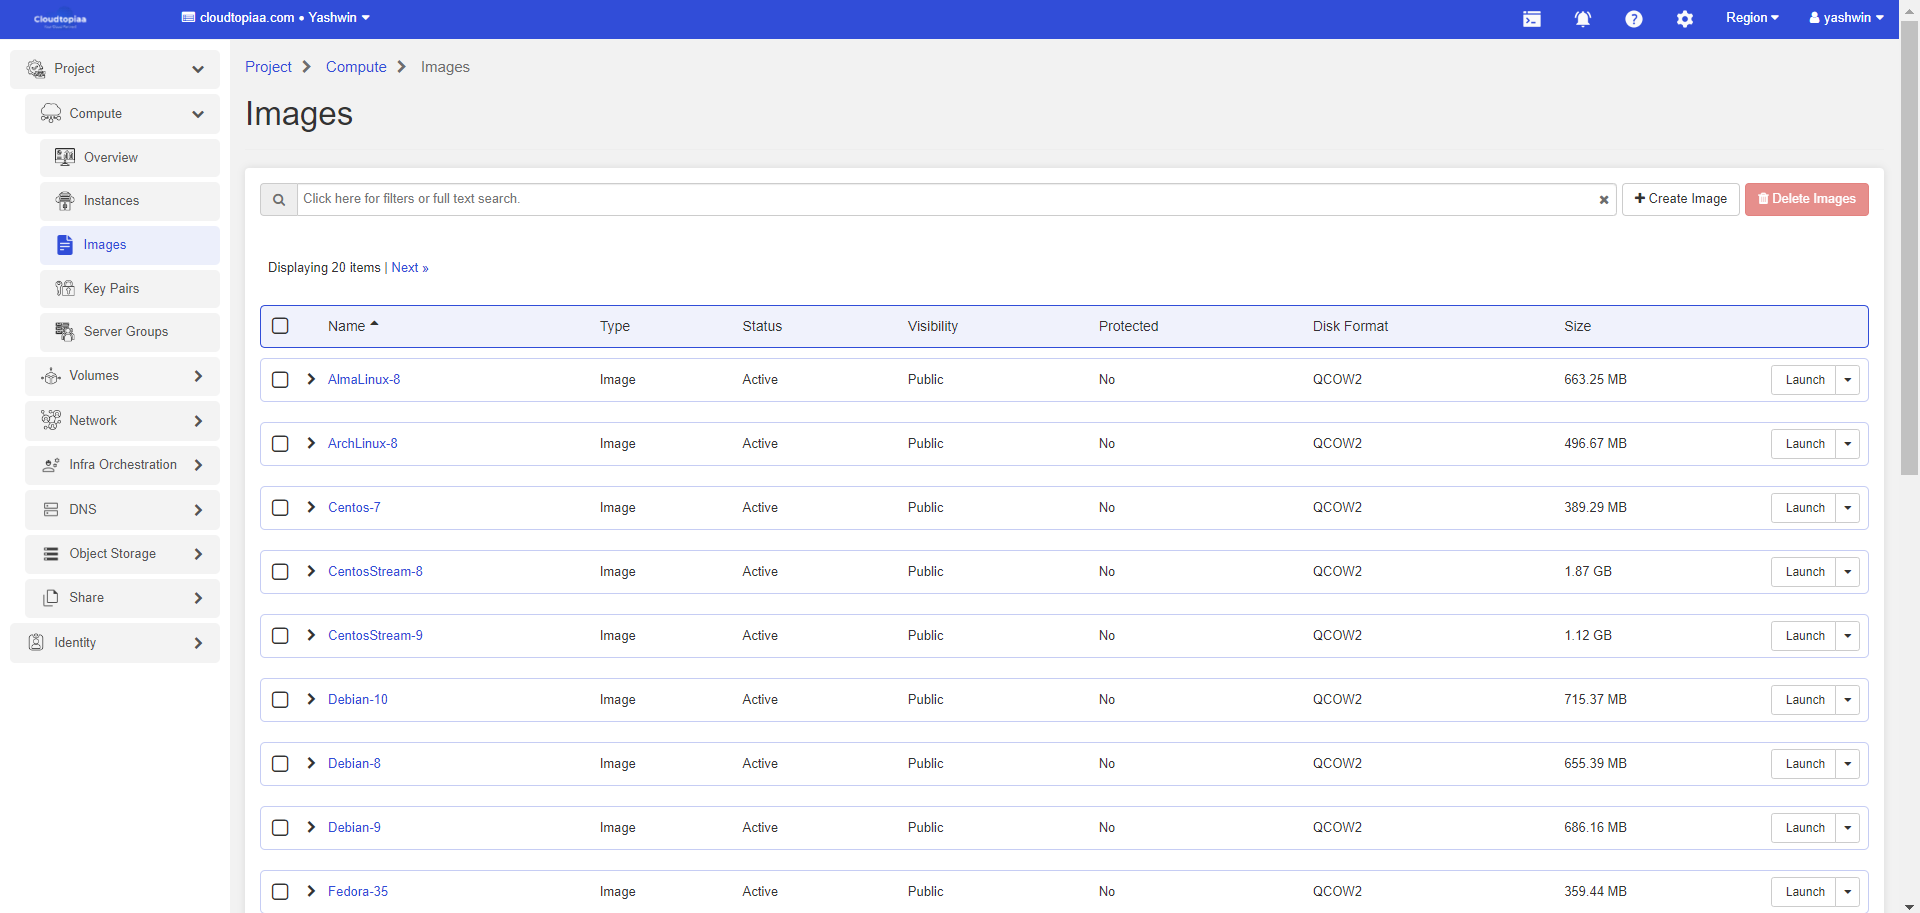
- Navigate to Project > Images and click Create Image.
- Enter the following values:
| Image Name | Enter a name for the image. |
| Image Source | Choose the image source from the dropdown list. Your choices are Image Location and Image File |
| Format | Select the image format (for example, QCOW2) for the image |
| Protected | Select this check box to ensure that only users with permissions can delete the image. |
| Visibility | Select Image visibility. Default is shared |
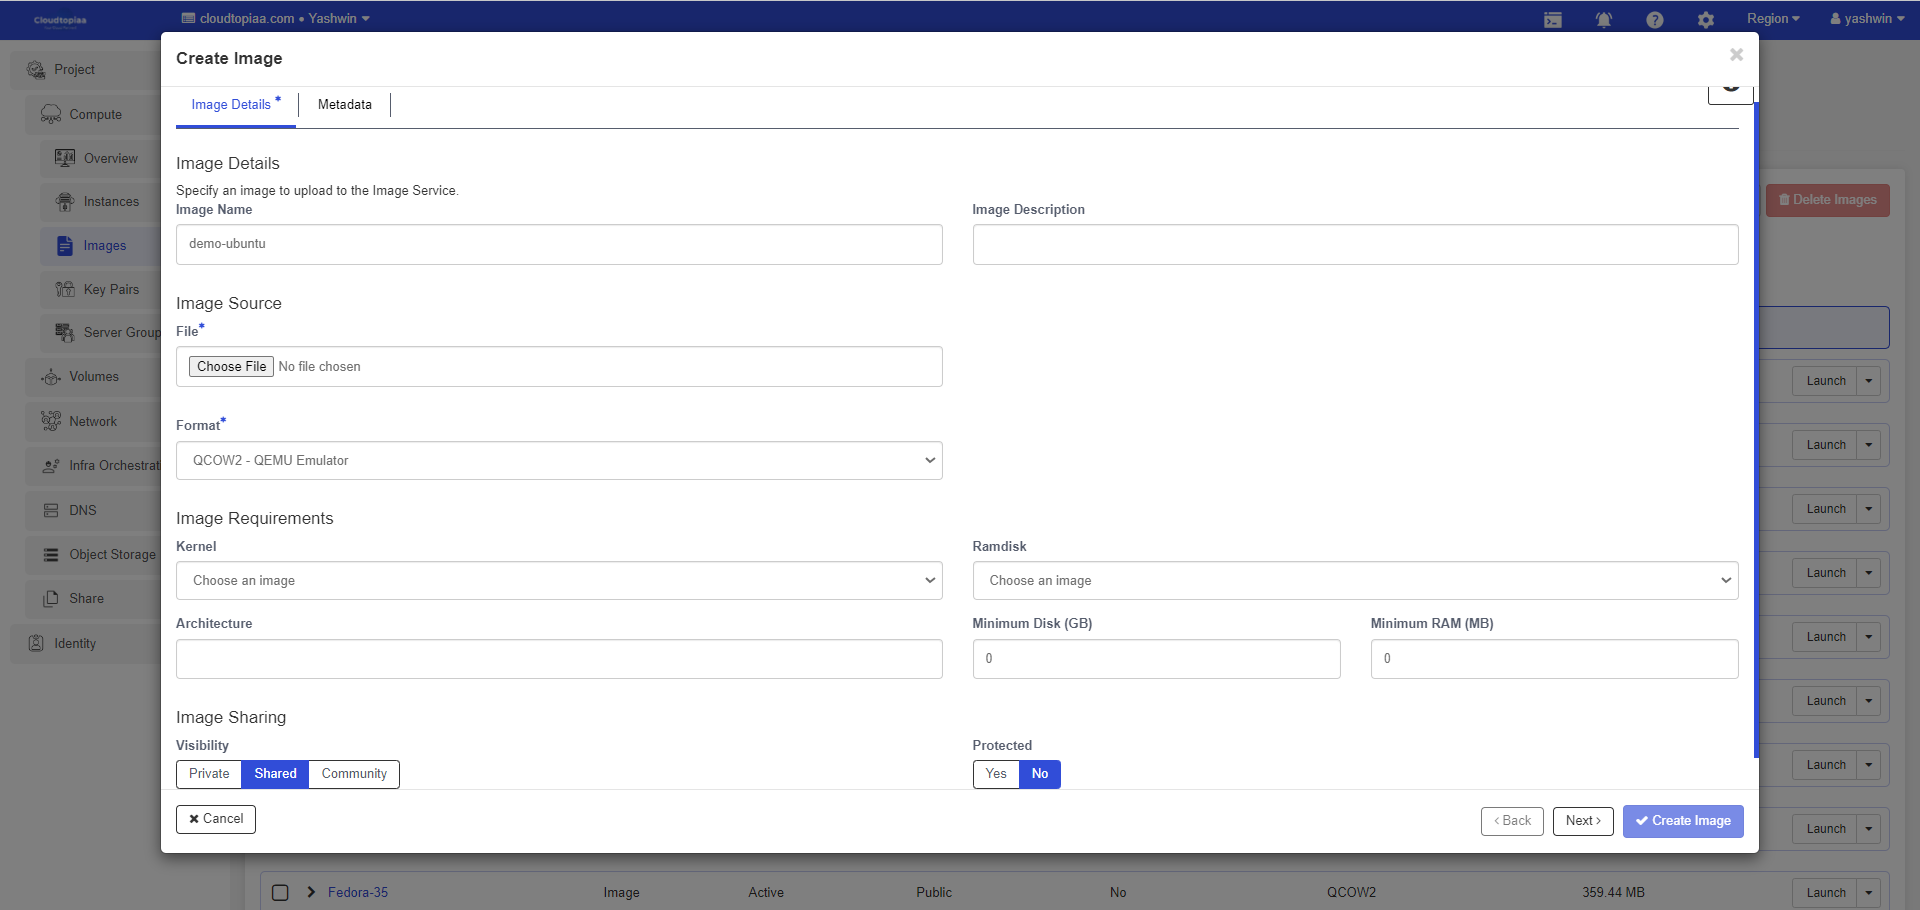
5. Click Create Image. The image is queued to be uploaded. It might take some time before the status changes from Queued to Active.